Copy Pastes from Docker’s Get Started doc
Create image, manage containers, docker cloud
https://docker.github.io/get-started/part2/#log-in-with-your-docker-id

Dockerfile
Create an empty directory. Change directories (cd) into the new directory, create a file called Dockerfile, copy-and-paste the following content into that file, and save it. Take note of the comments that explain each statement in your new Dockerfile.
# Use an official Python runtime as a parent image
FROM python:2.7-slim
# Set the working directory to /app
WORKDIR /app
# Copy the current directory contents into the container at /app
ADD . /app
# Install any needed packages specified in requirements.txt
RUN pip install -r requirements.txt
# Make port 80 available to the world outside this container
EXPOSE 80
# Define environment variable
ENV NAME World
# Run app.py when the container launches
CMD ["python", "app.py"]
requirements.txt
Flask
Redis
app.py
from flask import Flask
from redis import Redis, RedisError
import os
import socket
# Connect to Redis
redis = Redis(host="redis", db=0, socket_connect_timeout=2, socket_timeout=2)
app = Flask(__name__)
@app.route("/")
def hello():
try:
visits = redis.incr("counter")
except RedisError:
visits = "<i>cannot connect to Redis, counter disabled</i>"
html = "<h3>Hello {name}!</h3>" \
"<b>Hostname:</b> {hostname}<br/>" \
"<b>Visits:</b> {visits}"
return html.format(name=os.getenv("NAME", "world"), hostname=socket.gethostname(), visits=visits)
if __name__ == "__main__":
app.run(host='0.0.0.0', port=80)
Create image
$ ls
Dockerfile app.py requirements.txt
Now run the build command. This creates a Docker image, which we’re going to tag using -t so it has a friendly name.
$ docker build -t friendlyhello .
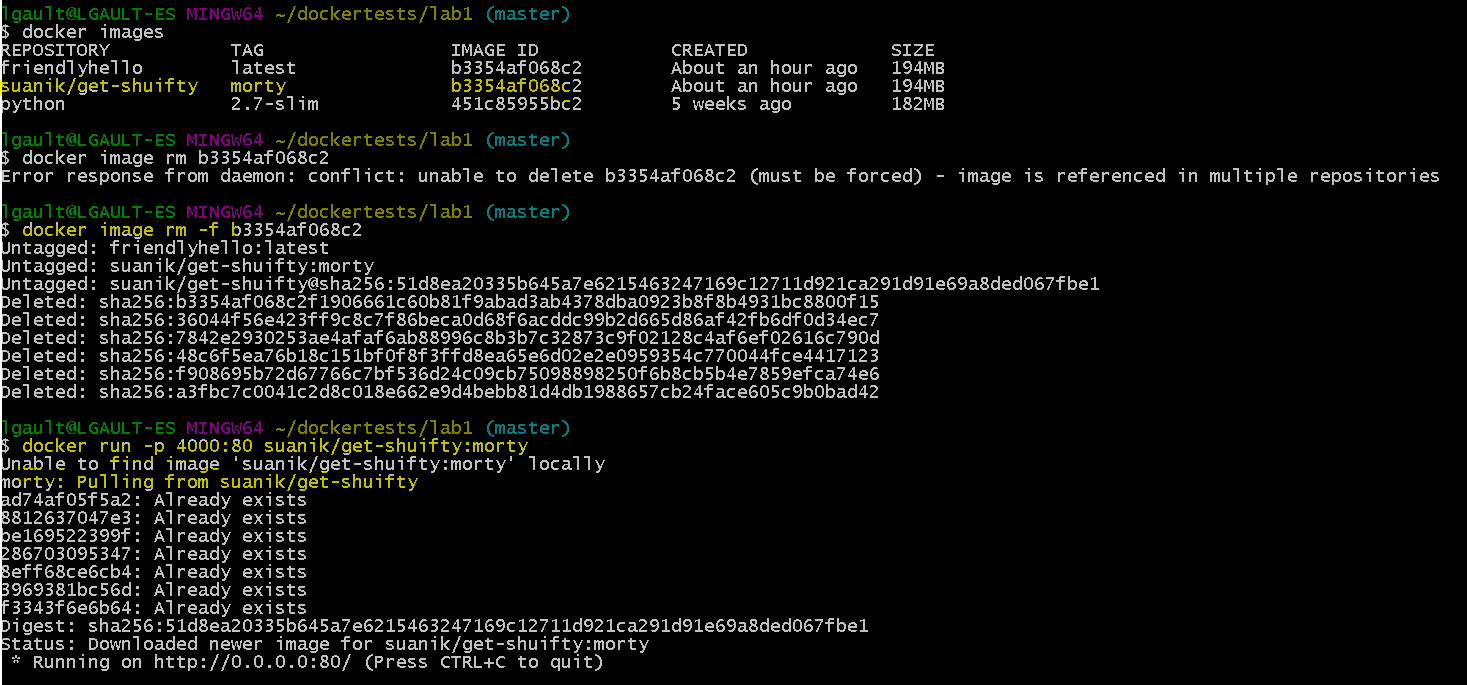
Where is your built image? It’s in your machine’s local Docker image registry:
$ docker images
REPOSITORY TAG IMAGE ID
friendlyhello latest 326387cea398

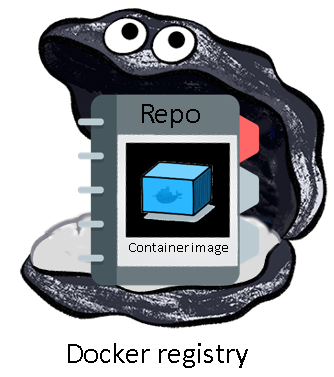
Figure 1: Each container image seems to be stored in a dedicated repository, in the local Docker Registry.
Run container from image
Run the app, mapping your machine’s port 4000 to the container’s published port 80 using -p:
$ docker run -p 4000:80 friendlyhello
Now let’s run the app in the background, in detached mode:
docker run -d -p 4000:80 friendlyhello

list running containers
docker container ls

Stop container by ID from ("docker container ls")
docker stop Container-ID
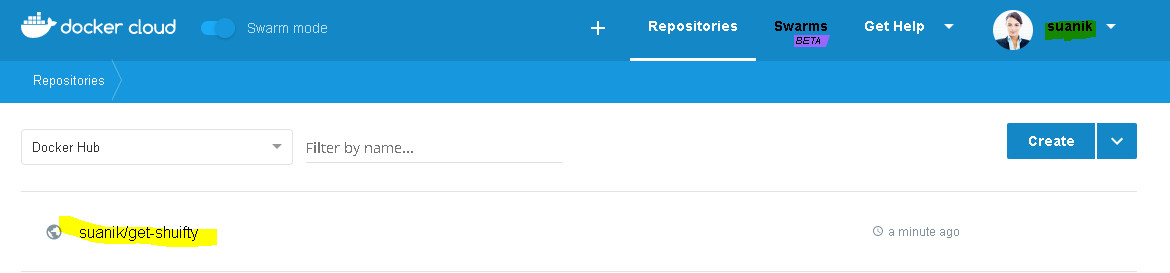
Upload your image to a repo in Docker Cloud
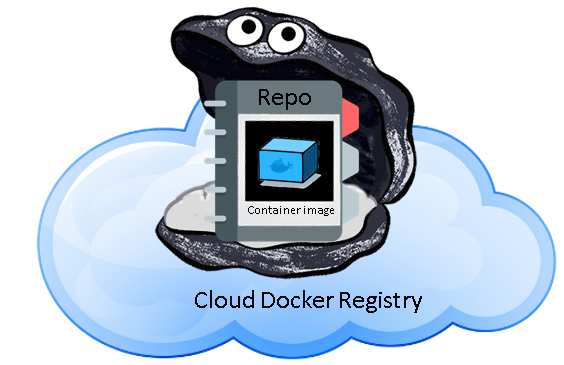
Figure 2 cloud.docker.com hosts a cloud Docker Registry for registered users. It is linked with hub.docker.com
Loggin to cloud.docker.com
docker login

Create a new image from another one (by repo-name)
docker tag imageName username/repositoryName:tag

docker push username/repository:tag

If we are logged into Docker Cloud, but don’t have the image locally, it will be pulled from the remote repository
Part 2: Compose

Figure 3 Docker Compose (the octopus) arranges multiple containers on a Swarm (i.e. a cluster of machines each running a docker engine). You can scatter those containers on different machines.
Compose is a tool for defining and running multi-container Docker applications. With Compose, you use a Compose file to configure your application’s services. Then, using a single command, you create and start all the services from your configuration.
new load-balanced app
docker-compose.yml
version: "3"
services:
web:
# replace username/repo:tag with your name and image details
image: suanik/get-shuifty:morty
deploy:
replicas: 5
resources:
limits:
cpus: "0.1"
memory: 50M
restart_policy:
condition: on-failure
ports:
- "80:80"
networks:
- webnet
networks:
webnet:

Figure 4 Docker Swarm. The picture is misleading, because a container cannot be run by several machines at once.
Before we can use the docker stack deploy command we’ll first run:
docker swarm init

We now have a one-node swarm running
Now let’sdeploy our stack. You have to give your app a name. Here, it is set to getstartedlab:
docker stack deploy -c docker-compose.yml getstartedlab

Our single service stack is running 5 container instances of our deployed image on one host. Let’s investigate.
Get the service ID for the one service in our application:
docker service ls
Docker swarms run tasks that spawn containers. Tasks have state and their own IDs:
docker service ps <serviceID>

Let’s inspect one task and limit the ouput to container ID:
docker inspect --format='{{.Status.ContainerStatus.ContainerID}}' <task>
Vice versa, inspect the container ID, and extract the task ID:
docker inspect --format="{{index .Config.Labels \"com.docker.swarm.task.id\"}}" <container>
Now list all 5 containers:
docker container ls -q
Scale the app
You can scale the app by changing the replicas value in docker-compose.yml, saving the change, and re-running the docker stack deploy command:
docker stack deploy -c docker-compose.yml getstartedlab
Docker will do an in-place update, no need to tear the stack down first or kill any containers.

Take the app down with docker stack rm:
docker stack rm getstartedlab
This removes the app, but our one-node swarm is still up and running (as shown by docker node ls). Take down the swarm with docker swarm leave –force

Cheatsheet:
docker stack ls # List stacks or apps
docker stack deploy -c <composefile> <appname> # Run the specified Compose file
docker service ls # List running services associated with an app
docker service ps <service> # List tasks associated with an app
docker inspect <task or container> # Inspect task or container
docker container ls -q # List container IDs
docker stack rm <appname> # Tear down an application
Part 4: Swarms
https://docker.github.io/get-started/part4/
run docker swarm init to enable swarm mode and make your current machine a swarm manager, then run docker swarm join on other machines to have them join the swarm as workers.
Create a cluster
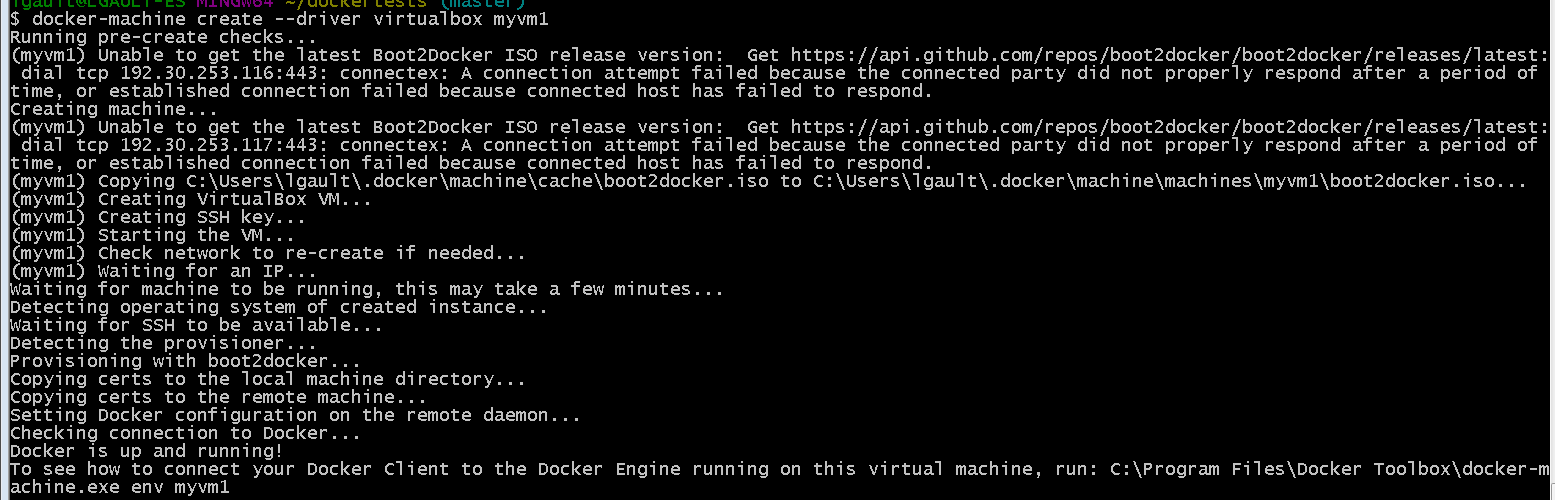
Now, create a couple of VMs using docker-machine, using the VirtualBox driver:
$ docker-machine create --driver virtualbox myvm1
$ docker-machine create --driver virtualbox myvm2
You can send commands to your VMs using docker-machine ssh. Instruct myvm1 to become a swarm manager with docker swarm init and you’ll see output like this:
$ docker-machine ssh myvm1 "docker swarm init"

As you can see, the response to docker swarm init contains a pre-configureddocker swarm join command for you to run on any nodes you want to add. Copy this command, and send it to myvm2 via docker-machine ssh to have myvm2 join your new swarm as a worker:
$ docker-machine ssh myvm2 "docker swarm join \
--token <token> \
<ip>:<port>"
Use ssh to connect to the (docker-machine ssh myvm1), and run docker node ls to view the nodes in this swarm:

Deploy your app on a cluster
Copy the file docker-compose.yml you created in part 3 to the swarm manager myvm1’s home directory
docker-machine scp docker-compose.yml myvm1:~
docker-machine ssh myvm1 "docker stack deploy -c docker-compose.yml getstartedlab"
$ docker-machine ssh myvm1 "docker stack ps getstartedlab"

Accessing your cluster
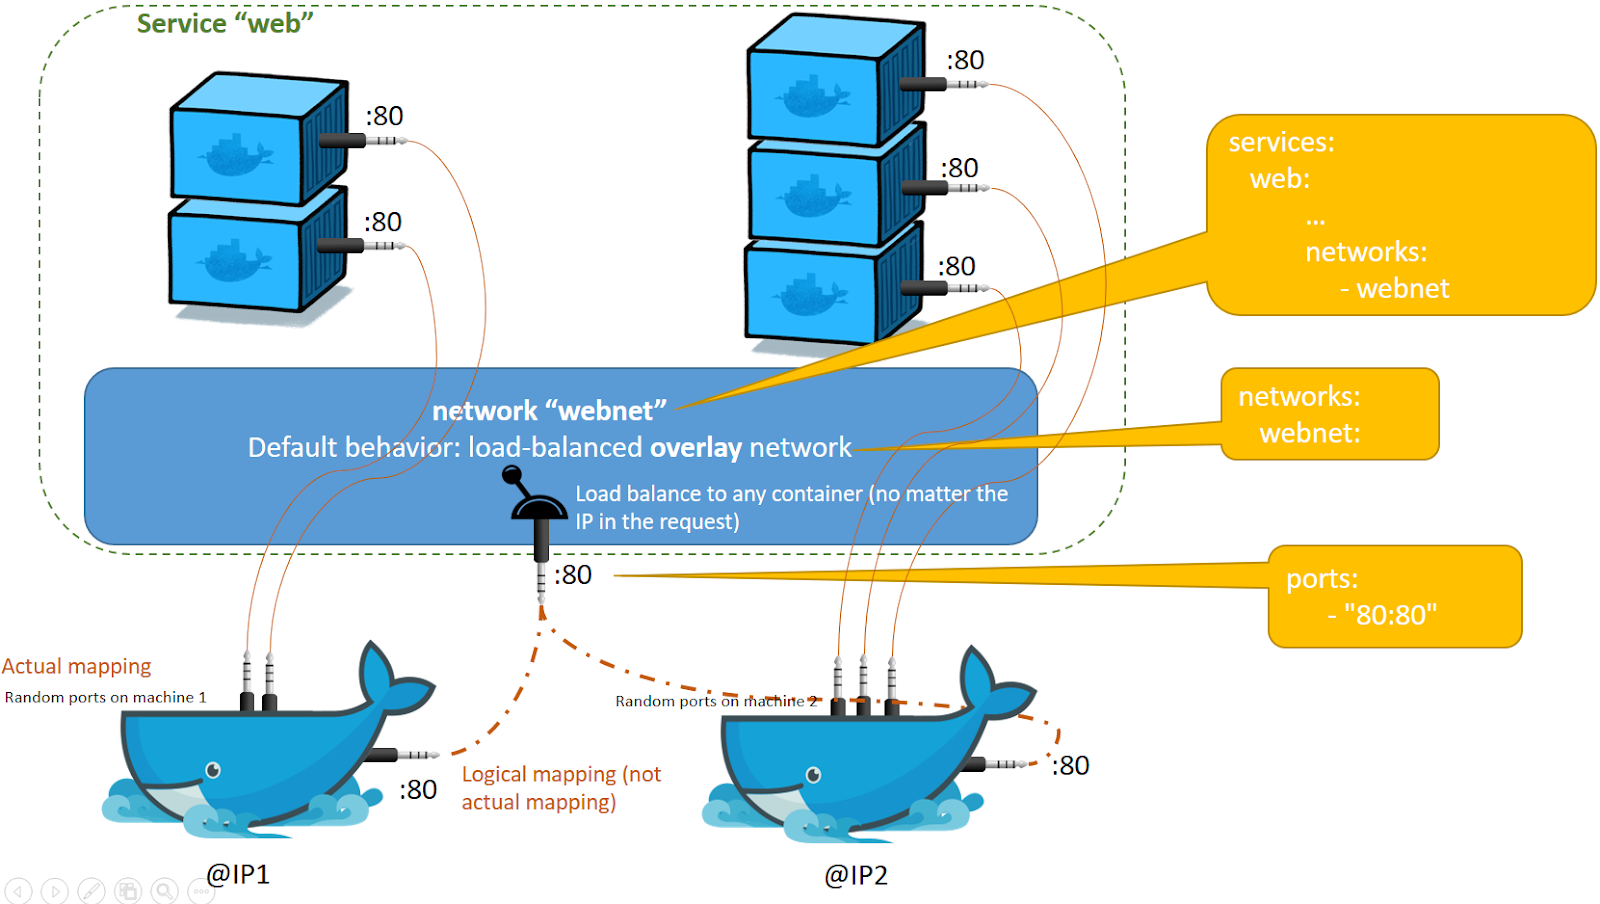
You can access your app from the IP address of either myvm1 or myvm2. The network you created is shared between them and load-balancing. Run docker-machine ls to get your VMs’ IP addresses and visit either of them on a browser, hitting refresh (or just curl them). You’ll see five possible container IDs all cycling by randomly, demonstrating the load-balancing.
The reason both IP addresses work is that nodes in a swarm participate in an ingress routing mesh. This ensures that a service deployed at a certain port within your swarm always has that port reserved to itself, no matter what node is actually running the container. Here’s a diagram of how a routing mesh for a service called my-web published at port 8080 on a three-node swarm would look:

Cleanup
You can tear down the stack with docker stack rm. For example:
docker-machine ssh myvm1 "docker stack rm getstartedlab"
At some point later, you can remove this swarm if you want to with docker-machine ssh myvm2 "docker swarm leave" on the worker and docker-machine ssh myvm1 "docker swarm leave --force" on the manager.
Cheatsheet
docker-machine create --driver virtualbox myvm1 # Create a VM (Mac, Win7, Linux)
docker-machine create -d hyperv --hyperv-virtual-switch "myswitch" myvm1 # Win10
docker-machine env myvm1 # View basic information about your node
docker-machine ssh myvm1 "docker node ls" # List the nodes in your swarm
docker-machine ssh myvm1 "docker node inspect <node ID>" # Inspect a node
docker-machine ssh myvm1 "docker swarm join-token -q worker" # View join token
docker-machine ssh myvm1 # Open an SSH session with the VM; type "exit" to end
docker-machine ssh myvm2 "docker swarm leave" # Make the worker leave the swarm
docker-machine ssh myvm1 "docker swarm leave -f" # Make master leave, kill swarm
docker-machine start myvm1 # Start a VM that is currently not running
docker-machine stop $(docker-machine ls -q) # Stop all running VMs
docker-machine rm $(docker-machine ls -q) # Delete all VMs and their disk images
docker-machine scp docker-compose.yml myvm1:~ # Copy file to node's home dir
docker-machine ssh myvm1 "docker stack deploy -c <file> <app>" # Deploy an app
Part 5: Stacks
https://docker.github.io/get-started/part5/
Add a new service and redeploy
It’s easy to add services to our docker-compose.yml file. First, let’s add a free visualizer service that lets us look at how our swarm is scheduling containers.
Open up docker-compose.yml in an editor and replace its contents with the following. Be sure to replace username/repo:tag with your image details.
version: "3"
services:
web:
# replace username/repo:tag with your name and image details
image: username/repo:tag
deploy:
replicas: 5
restart_policy:
condition: on-failure
resources:
limits:
cpus: "0.1"
memory: 50M
ports:
- "80:80"
networks:
- webnet
visualizer:
image: dockersamples/visualizer:stable
ports:
- "8080:8080"
volumes:
- "/var/run/docker.sock:/var/run/docker.sock"
deploy:
placement:
constraints: [node.role == manager]
networks:
- webnet
networks:
webnet:
Re-run the docker stack deploy command on the manager, and whatever services need updating will be updated:
$ docker stack deploy -c docker-compose.yml getstartedlab
Now you can visit the visualizer service

Figure 5 The single copy of visualizer is running on the manager as you expect, and the 5 instances of web are spread out across the swarm.
The visualizer is a standalone service that can run in any app that includes it in the stack. It doesn’t depend on anything else.
You can corroborate this visualization by running docker stack ps <stack>:

Persist the data
Save this new docker-compose.yml file, which finally adds a Redis service.
version: "3"
services:
web:
# replace username/repo:tag with your name and image details
image: suanik/get-shuifty:morty
deploy:
replicas: 5
restart_policy:
condition: on-failure
resources:
limits:
cpus: "0.1"
memory: 50M
ports:
- "80:80"
networks:
- webnet
visualizer:
image: dockersamples/visualizer:stable
ports:
- "8080:8080"
volumes:
- "/var/run/docker.sock:/var/run/docker.sock"
deploy:
placement:
constraints: [node.role == manager]
networks:
- webnet
redis:
image: redis
ports:
- "6379:6379"
volumes:
- /home/docker/data:/data
deploy:
placement:
constraints: [node.role == manager]
command: redis-server --appendonly yes
networks:
- webnet
networks:
webnet:
Create a ./data directory on the manager:
docker-machine ssh myvm1 "mkdir ./data"
Run docker stack deploy one more time.
$ docker stack deploy -c docker-compose.yml getstartedlab
Run docker service ls to verify that the three services are running as expected.

Comments
Post a Comment